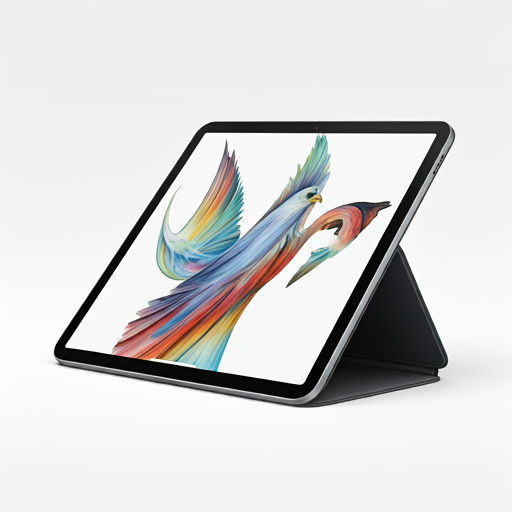
With the release of advanced drawing apps and the Apple Pencil, the iPad has become a go-to tool for both beginner and professional digital artists. Whether you’re sketching, painting, or creating detailed illustrations, the iPad offers precision, accessibility, and a range of features to enhance your workflow. This guide explores essential Apple Pencil tips and the best iOS drawing tools to take your art to the next level.
1. Getting Started with Your Apple Pencil
Connecting Apple Pencil to Your iPad
To start, connect the Apple Pencil to your iPad by attaching it to the side for pairing. Once connected, you can access various customization options in Settings > Apple Pencil.
- Double-Tap Shortcut: Apple Pencil has a built-in double-tap feature that you can customize. By default, it switches between your current tool and the eraser, but you can set it to any frequently used tool.
Adjusting Pencil Sensitivity
For artists, pressure sensitivity is key. You can adjust the sensitivity level in apps like Procreate to mimic the feel of traditional brushes. This feature provides a more authentic experience, making it easier to create variations in line thickness and shading.
2. Essential iOS Drawing Tools and Apps
Procreate
This app is often hailed as the gold standard for digital art on the iPad. Its user-friendly interface, extensive brush library, and responsive layers make it a favorite among professional artists. Key features include:
- Brush Studio: Customize or create new brushes to suit your style. Adjust parameters like shape, opacity, and texture for unique effects.
- QuickShape Tool: Allows you to create perfect shapes and lines. Draw a rough shape and hold the stylus; Procreate will automatically correct it.
Adobe Fresco
This is another top-tier app known for its Live Brushes, which mimic real watercolors and oils. It’s perfect for artists looking to experiment with different textures.
- Blending and Smudging: Use blending tools to mix colors, creating realistic transitions.
- Vector Brushes: These brushes are scalable, ideal for artwork that may need resizing without quality loss.
Clip Studio Paint
Popular among manga and comic artists, Clip Studio Paint provides specialized tools for intricate line work and inking. The stabilization tool helps control line smoothness, while the paneling tool is perfect for creating comics and storyboards.
3. Advanced Apple Pencil Tips for Precision and Control
Mastering Pressure Sensitivity and Tilt
Apple Pencil’s pressure sensitivity lets you create nuanced strokes, while the tilt feature allows for broad shading. These features give you incredible control over your brushwork.
- Pro Tip: Customize brush sensitivity to your liking in Settings > Apple Pencil or within individual apps like Procreate. This enables more precise control over stroke weight, an essential feature for detailed illustration work.
Using Double-Tap for Efficiency
Save time by setting the double-tap feature to frequently used tools, like the eraser or color picker. This small adjustment can streamline your workflow significantly.
Customizing Brushes for Consistent Style
Experimenting with brush settings can add a unique touch to your art. Apps like Procreate let you save customized brushes for easy access, ensuring consistency across projects.
4. Setting Up the iPad for Optimal Art Creation
Calibrate Color Settings
To achieve color accuracy, enable True Tone and adjust brightness in Settings > Display & Brightness. This setting adapts to ambient lighting, making colors appear natural.
Turn on Low Power Mode for Prolonged Sessions
For long art sessions, activate Low Power Mode to extend your battery life. Go to Settings > Battery and turn it on to prevent unexpected shutdowns during intensive projects.
Optimize Performance with Free Storage Space
Art apps can consume significant storage. Regularly free up space by deleting unnecessary files or backing up to iCloud. A clutter-free iPad helps prevent lag, especially when working with high-resolution canvases.
5. Mastering Layers, Blending Modes, and Textures in Procreate

Layer Management
Layers are essential for complex artworks, allowing you to separate elements without affecting the whole composition. In Procreate, you can add, duplicate, and reorder layers.
- Group Layers: Group layers to organize different parts of your artwork, like background, characters, and foreground. This keeps your workspace organized.
Experimenting with Blending Modes
Blending modes like Multiply, Overlay, and Soft Light can create different effects by interacting with layers below. Use these modes to add shadows, highlights, or color overlays.
- Pro Tip: For smooth shadows, duplicate a layer, set it to Multiply, and lower the opacity.
Creating Texture with Custom Brushes
Textures bring depth to your artwork. Use texture brushes for skin, fabric, or nature elements. For a unique style, try creating your custom brush with specific textures in Brush Studio.
6. Exporting and Sharing Your Artwork
Choosing the Right File Format
Exporting your artwork in the correct format ensures quality, especially if it’s for professional use.
- JPEG or PNG: Ideal for online sharing.
- PSD: Best for collaborative work, keeping all layers intact.
- TIFF or PDF: High-quality formats suitable for printing.
Exporting Time-Lapse Videos
Procreate has a time-lapse recording feature, allowing you to document your creative process. This feature is great for social media, as viewers enjoy seeing the progression of an artwork.
Enhance Your Digital Art Experience with iPad and Apple Pencil
Mastering the iPad and Apple Pencil transforms your device into a powerful digital art tool. By setting up your iPad for optimal performance, using the best iOS drawing tools, and implementing advanced Apple Pencil tips, you can elevate your digital art skills. Start exploring these techniques today and watch your creativity flourish.
Stay Updated: Follow us on Facebook, X (formerly Twitter), and LinkedIn for more tips, tools, and updates tailored for digital artists.


